
You can fix low compression on a chainsaw by performing a compression test. Check the piston, rings, and cylinder by removing the spark plug and the muffler, and replace any problematic parts. If the parts above are in good shape, check the gasket and replace it if required.
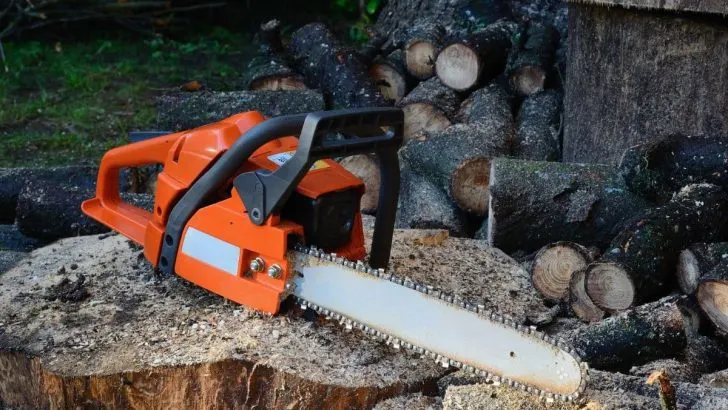
This article will provide an in-depth guide to the steps you should take to address low compression on a chainsaw. Let’s get started!
1. Buy a Compression Gauge and Appropriate Tools
If you have never repaired a chainsaw, I recommend thoroughly reading this article before attempting any repairs. Always wear the appropriate safety gear, and don’t hesitate to consult a professional if you need help.
Buying the appropriate tools to disassemble your chainsaw and a compression gauge is the first step in fixing low compression.
A compression gauge tests the amount of compression inside your engine, showing you if anything is amiss (source).
Reasons for Low Compression in a Chainsaw
There are two main reasons for low compression in a chainsaw:
- A scored piston and cylinder or damaged rings. When your engine overheats due to low lubricant levels or any other reason, the piston can easily get damaged and scored. The cylinder and piston can also score due to debris inside the combustion chamber which can scuff off the cylinder walls, piston, and rings.
- A blown-out gasket. This part keeps the engine head and block together and prevents the gas from escaping. If the gasket is damaged or blown out, you will experience low compression (source).
You can easily spot the problems mentioned above with a compression gauge.
2. Unscrew the Spark Plug and Attach the Compression Gauge
The first diagnostic check to perform is the compression test which will give us an idea of what’s going on inside the engine. Here’s how to run the test:
- Grab a socket wrench and remove the spark plug from the engine.
- Screw in your compression gauge and pull on the rope a few times.
- After you’ve pulled on the rope several times, a reading should display on the compression gauge. A healthy engine produces 100-160 psi of compression. Anything below that means something is wrong with the machine and needs further attention.
3. Inspect the Piston & Cylinder Through the Spark Plug Hole
A compression test reading below 100 psi is a concerning sign and indicates that the engine has a gas leak. Causes for this include:
- A scored piston
- A damaged cylinder
- A blown-out gasket
Here are the steps to follow after performing the compression test:
- Take the compression gauge out of the spark plug socket and inspect the opening. You’ll notice that rotating the flywheel back and forth allows you to look directly at the piston and rings.
- Check for grooves and deep scratches on the piston and cylinder. Signs of deterioration confirm that the piston and cylinder need a replacement.
In some cases, you can salvage the cylinder with good lathe work. However, this would require getting a larger piston to accommodate the bigger cylinder. The easiest way to fix this issue is to get a new head assembly with a new piston and rings included.
4. Look Through the Muffler Hole to Inspect the Engine Parts
If you don’t find any damage through the spark plug hole, remove the muffler to inspect the engine parts further:
- Find the other opening behind the exhaust.
- Look through the opening with a flashlight for signs of damage.
- If you find a scored piston or any other part that’s damaged, you’ve spotted the source of the issue, and you should replace the damaged parts.
- If both sides of the engine are in good shape, you have a blown-out gasket on your hands and need to disassemble the chainsaw to install a new one. The video below will guide you on how to do this correctly:

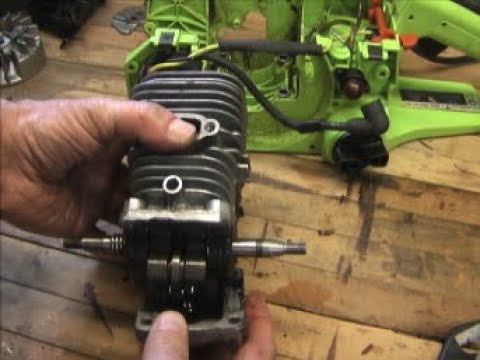
5. Disassemble the Chainsaw and Replace the Damaged Part
This step involves taking the chainsaw apart and replacing the damaged component. It’s relatively easy to do, and you will need various tools:
- Socket wrench or torque screwdriver
- Impact tool
- Clutch-removal tool
- Punch
After gathering the necessary tools, follow these steps:
- Remove the chain and bar from the side cover. Pry out the chain and bar using your socket wrench or screwdriver.
- Remove the starter cover and air filter. Remove the screws from the starter cover, take it off, and detach the handle. Remove the air filter and the cover holding it in by taking out the bolts on the filter cover.
- Detach the carburetor and remove the flywheel. Take care with this step, as you must release the fuel line and the cables leading into the carburetor. Feed some rope into the cylinder with the piston at the bottom to keep the internal part from breaking when you unscrew the flywheel. Use a socket wrench or impact tool to unscrew the flywheel.
- Take out the clutch and remove the fuel pump. Use a clutch-removal tool to remove the clutch. An arrow should point in the direction you rotate to unscrew it. After taking out the clutch, remove all the remaining parts to get to the fuel pump.
- Remove the cylinder and piston. You’ll notice some screws or bolts at the bottom holding the cylinder to the body. Take these out and remove the cylinder. Pry out the crankcase and remove the crankshaft and piston from the cylinder.
- Detach the piton from the crankshaft. Take out the spring clips on both sides of the piston and remove the wrist pin holding the piston to the crankshaft’s connecting rod. You may need a punch to force out the wrist pin.
- Replace the cylinder. Install the rings on your new piston with the correct calibration. Lubricate the wrist pin and attach it to the counting rod on your crankshaft.
- Replace the piston in the cylinder. Lubricate the piston before placing it back in the cylinder, and use a seal maker to reattach the crankcase to the engine block. Put everything back as you removed it.
- Test it. Once everything is back in place, take out the chainsaw and test it:
What can you do when your chainsaw muffler is full of gas? Click on the link to learn how to pinpoint and troubleshoot the issue.
Conclusion
Experiencing low compression on a chainsaw can be frustrating. However, following the steps in this article, your chainsaw should come back to life with full power. You should find the process easy if you use the correct tools and be mindful of reassembling everything correctly.
