Jumping the solenoid can be handy if you have starting issues with your mower. However, it’s best to only use it as a few times alternative because it’s not the recommended way to start the machine. The way to go is to diagnose the fault with your mower and fix it.
While it might seem like the issue is due to a faulty solenoid, it isn’t always the case. This article will teach why your mower only starts when you jump solenoid. You’ll get a detailed insight into how to diagnose and fix the issue on your mower.
Before going into the causes of the issue and its solutions, it’s imperative to understand how a starter solenoid works. Understanding how a starter solenoid works will help you better understand why you’re having problems with your machine.
The starter system makes your lawnmower start when you activate the ignition button, and a solenoid is essential to the starter system. It’s responsible for sending current from the battery to the engine.
When you start the machine, the battery sends an electrical current to the solenoid. The solenoid does its work and sends a more powerful current to the starter motor, which starts the machine. Any flaw in this process might cause your mower not to start.
However, you can start the machine even if the solenoid is faulty when you jump it. When you bypass the solenoid, you’re using another method to send the required signal to the engine instead of the solenoid.
Why Does My Mower Only Start When I Jump Solenoid?
Many reasons could cause your lawn mower to only start when you jump the solenoid, and the most common one is issues with the solenoid itself. Other possible causes include a fault with the ignition system, terminals, or control cable.
This section will give you a detailed look into these causes and their possible solutions.
1. Faulty Solenoid
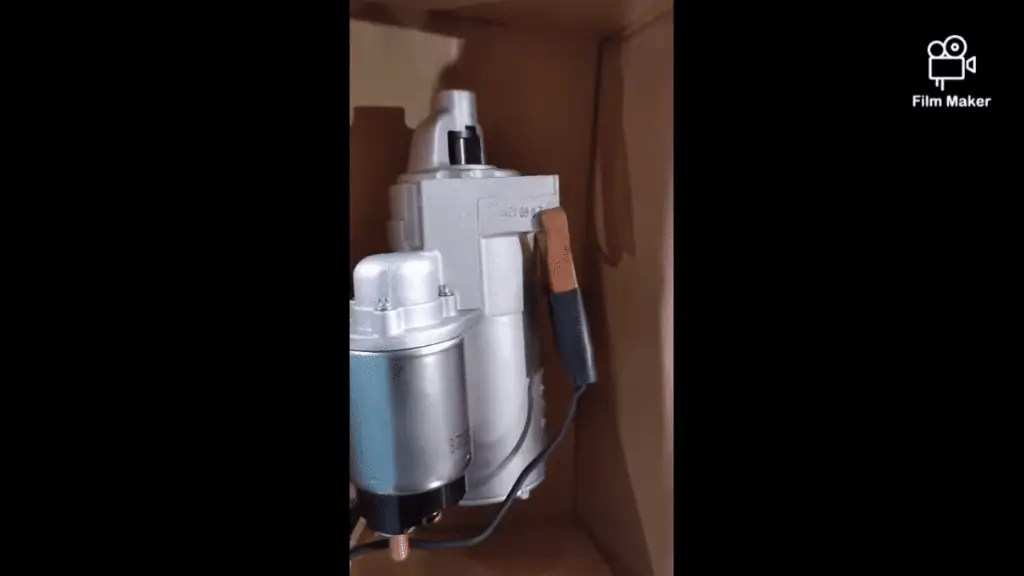
As mentioned, the starter solenoid transfers current from the battery to the engine. Most mowers will have a square or round 3 or 4 posts solenoid responsible for running them. However, the most common problem for both solenoid types is similar.
Most solenoids have an electromagnet that completes the circuit between the battery and the solenoid. After some time, the electromagnet can become too weak to serve its purpose, thus causing problems. Alternatively, the component can wear down and jam up due to its nonstop plunging.
The best way to know if the solenoid is a faulty machine part is to inspect other components. If all the other starting components work fine, then the problem is from a faulty solenoid.
How to Fix a Faulty Solenoid In Your Lawnmower
You must know where it is before you can do anything with the solenoid. You can locate the solenoid by checking your owner’s manual. Alternatively, you can follow the positive wire on your battery to find it because the cable directly leads to the solenoid.
After locating the solenoid, the next step is to fix it if it’s faulty. Repairing a bad solenoid is rare, and you’ll mostly have to replace it. Follow these steps to replace the solenoid on your lawnmower.
Turn off your lawnmower’s ignition and its cover to expose the battery area. You’ll need a socket wrench to remove the nuts holding the solenoid cables.
Remove the bolts that fasten the solenoid to the mower’s frame.
Remove the solenoid from the machine. It’s best to take a photo of the connections if you’re working with the mower for the first time to help you remember how to re-fix it.
Replace the solenoid with a compatible one for your machine. You can check the owner’s manual or manufacturer’s website to know the specific solenoid type for your lawn mower. Ensure you connect all terminals correctly, or the fix might not work.
Reconnect all the required cables and terminals, and the lawn mower should start well.
When you activate the ignition button sends a signal to the starter circuit, which activates the solenoid. A fault with the ignition will mean it can’t send the required power to other starter components, and the mower might not start. The best way to diagnose if the ignition is the problem is to perform an output voltage test.
You’ll need to use a multimeter for the test, and if you don’t have one, you can get one at a local electrical store. Follow the steps below to check the output voltage of your ignition switch.
Power on the multimeter and connect the ground to the lawn mower’s battery negative terminal.
Connect the multimeter’s positive terminal to the ignition switch’s starter terminal.
Check the voltage of the connected component after you’ve connected all entities correctly.
Most mowers either have a 12V or 6V battery. The multimeter should read 12V for a lawnmower with the same battery type and 6V for a 6V machine. Anything less than this reading signals that something’s wrong with the mower.
How to Fix A Faulty Ignition on Your Lawn Mower
It’s best to change the ignition system if you notice it is faulty. Then, you can be confident it’ll serve you for a while. Luckily, most lawnmowers (especially riding mowers) have an easy-to-change ignition system.
Follow the steps below to change the ignition on your lawn mower.
Remove the main battery fuse and ignition key from your lawnmower.
Lift the lawn mower’s hood and locate the ignition.
Squeeze the tabs at the back of the ignition; you should be able to bring it out.
Remove the ignition from its connector and attach the new one that you have appropriately.
Once again, you should only connect a compatible ignition switch to your lawn mower.
As mentioned earlier, the ignition will need to send current to the solenoid, and that’s when the control cable comes to play. Any fault or breakage with this cable will render it useless unless you change it. You can check the status of this control cable using a multimeter if you follow these simple steps.
Connect the multimeter’s negative side to your battery’s positive terminal and the multimeter’s positive terminal to the cable farthest from the ignition.
Move the ignition switch to the start position, and you should see a reading corresponding to your lawnmower’s battery voltage. Anything less than that reading is a sign that the cable is faulty.
Once you’ve diagnosed the issue, the next thing is to run the fix in the following section.
How to Replace the Control Cable on Your Lawn Mower
If your lawnmower is a few years old, it’s best to replace the complete wiring harness. You can replace the cable if the wiring harness still functions well.
To replace the wiring harness, all that you have to do is disconnect the old one and connect the new one. If you’re replacing the individual cable, disconnect it from the wiring harness and fix the new one. Memorize the connection pattern to make it easier to do the reconnections.
4. Broken Connections in the Starter Circuit Terminals
Many connections in your starter circuit make it start, and the machine may refuse to work if there’s a problem with any of them. A multimeter is a tool you can use to test the condition of your starter circuit.
The multimeter will let you check the incoming and outgoing power. A perfectly functioning lawn mower should have a balance between outgoing and incoming power. If the voltages are imbalanced after the test, something’s wrong with the component.
How to Fix Broken Connections in Your Starter Circuit Terminals?
You’ll have to inspect the circuit terminals to determine what went wrong. Tighten loose connections and refix broken ones to get the mower working regularly.
Sometimes, you won’t need repairs on the terminals because dirt and debris can hinder performance. Therefore, cleaning it with an electrical contact cleaner can work wonders.
Disconnecting the terminal before working on it to avoid accidents is imperative. Also, ensure that you use the correct tools to do the fixes. The tools you’ll need for this fix include pliers, an electrical contact cleaner, screwdrivers, a small socket wrench set, protective gloves, and a small wire brush.
Differences between a Jump Start and Jumping a Solenoid
When you jump the solenoid, the battery is good, but the solenoid is not. So, you’re trying to trick the machine into starting it with a bad solenoid. On the other hand, a jump start happens when the battery in your mower isn’t working, and you want to use the machine urgently.
Therefore, you’ll get an external battery to start it with because the lawnmower can’t possibly work without a battery. Jump-starting a mower is riskier than jumping the solenoid, which isn’t recommended. The reason is that mistakes can result in eye injury or burns.
If you want to jump-start your battery, wear protective equipment. Only jump-start your mower with a battery with a voltage that matches the one on your lawn mower.
Conclusion
Faulty solenoids and spark plugs are the two biggest reasons your lawn mower may require you to jump the solenoid whenever you want to start it. Aside from the fact that jumping the solenoid isn’t the regular way to start the machine, it’s uncomfortable. Therefore, it’s best to repair the mower as soon as possible so you can start it properly.
The diagnosis and fixes mentioned in this article will help you fix the issue on your lawn mower in no time. You should check the fuel and spark plug first before attempting other fixes. If the machine refuses to start after running all the fixes, it’s best to take it to a qualified technician for repair.
Lastly, wearing protective equipment is imperative anytime you want to work with your mower. Also, don’t attempt any repairs unless you have all the required tools.
Alex is a skilled gardener and lawn care expert with over 5 years of experience in the field. He developed a passion for horticulture at a young age and has since dedicated his life to mastering the art of landscaping. When he's not tending to gardens and lawns, Alex enjoys hiking, camping, and spending time with his family.