This is the last article in a series of four about the improvements I’ve made to my Portable Workshop. I’ll showcase everything this versatile homemade tool can do with some practical examples.
Who is this homemade woodworking tool for? I think it’s perfect for someone who doesn’t do big projects and who likes making their own tools. Someone who’s looking for something economical and who wants to get more out of their circular saw, jigsaw, and router, and who doesn’t have a particularly big workspace.
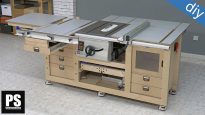
Plans for the 3-in-1 portable multi-function workbench:
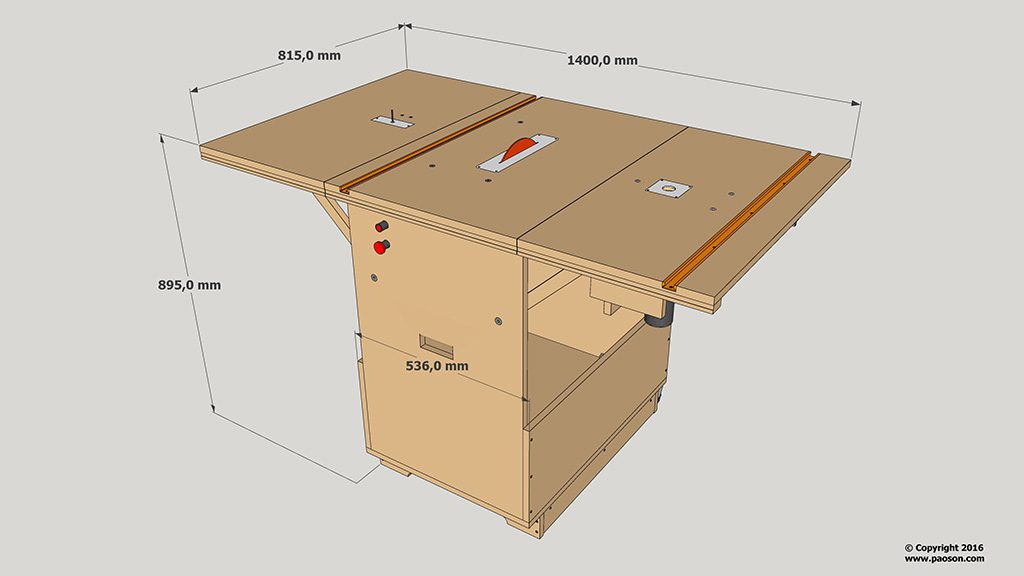
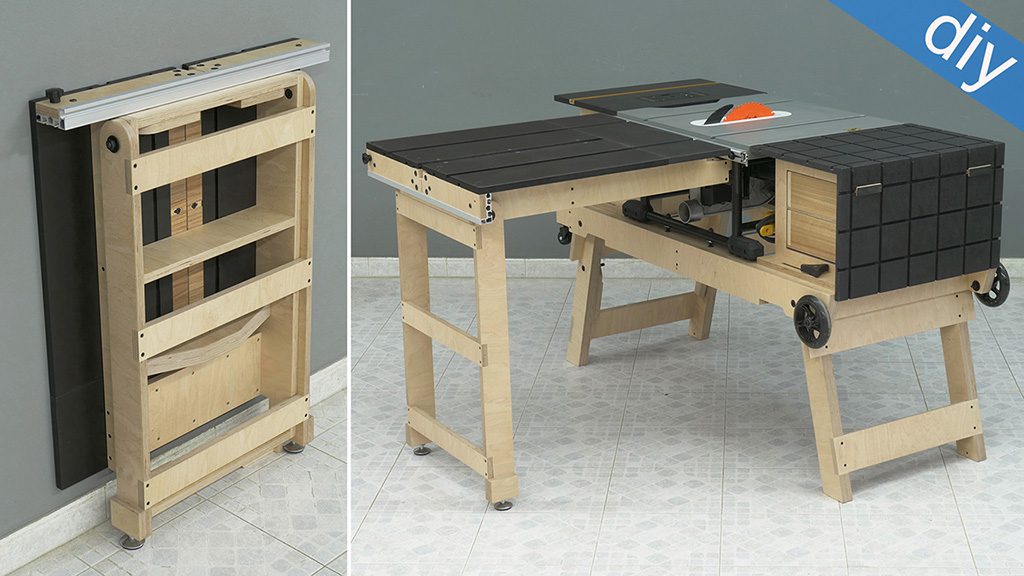
This is the 3D SketchUp model included in the plans available on my website. The tool has three main functions: a table saw, a jigsaw table and a router table.
I’ve posted a specific article for each of the three functions. If you’re interested in finding out how I made the modifications and improvements to my Portable Workshop you’ll find the links further down in this article.
Portable Workshop Plans
How to use a portable DIY multi-function workbench?
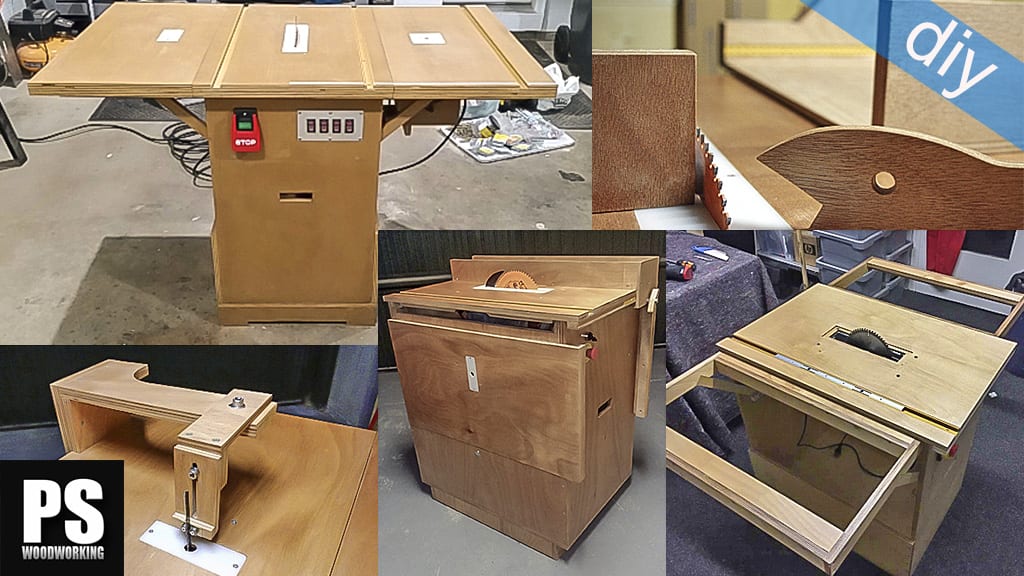
It’s been almost 7 years since I made the Portable Workshop. There’s nothing better than using a homemade tool for years to find small errors that are impossible to spot while you’re designing it on the computer.
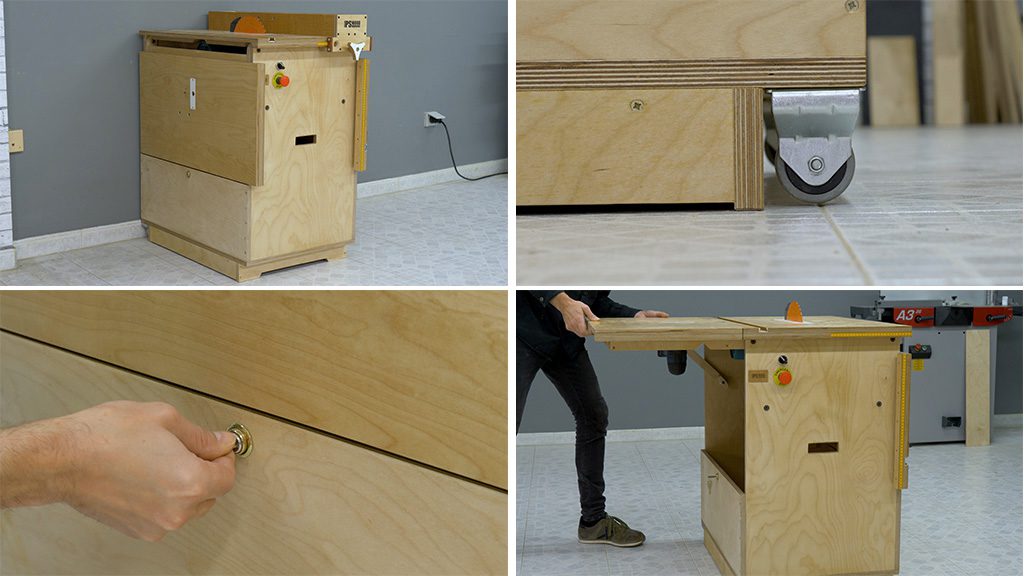
This design is perfect for small spaces such as a garage where you want to keep your car and at the same time do small DIY projects. When closed and up against a wall, the cabinet is only 82cm deep and 54cm wide.
I’ve fitted two wheels in the back so that I can move it easily. To open the two folding tables, first we must have the key to the lock on hand. This way we can safely store our power tools inside the cabinet. When open, the cabinet is 140cm wide.
After all these years, the board has stabilized and the folding tables have gone a little lower. In order to make them level again, I have to stick a strip of edgebanding on the bottom frame of each folding table. I’ve also used PVC edgebanding to adjust the height of the table stops.
How to use a portable table saw?
Now I’ll show you the first and most obvious function of this tool. I’ve installed an inverted circular saw to use as table saw. Back in the day, I made a recess in the bottom of the benchtop to insert the base of the circular saw, allowing for easier installation.
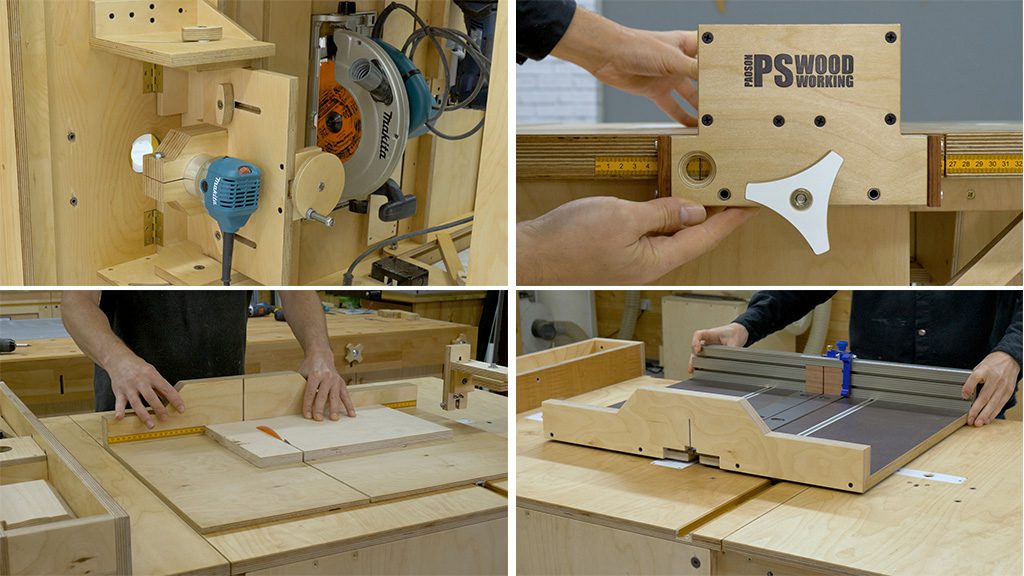
With this circular saw and a 235mm blade, I can get a cutting height of around 70mm. In the second photo you can see the saw fence. In the first article I showed how to make some improvements such as this cursor and a new blade alignment system.
This is a simple, easy to build fence, which is perfect for this kind of homemade table saw. This design also includes a simple crosscut sled. I think it’s enough for this kind of saw, too.
If you want something more precise and versatile, on my website you’ll find the plans for the sled with adjustable inserts I made for my last mobile workbench. You can make more types of cuts more accurately. You only need to adapt the sled sliders to the miter channel of your Portable Workshop.
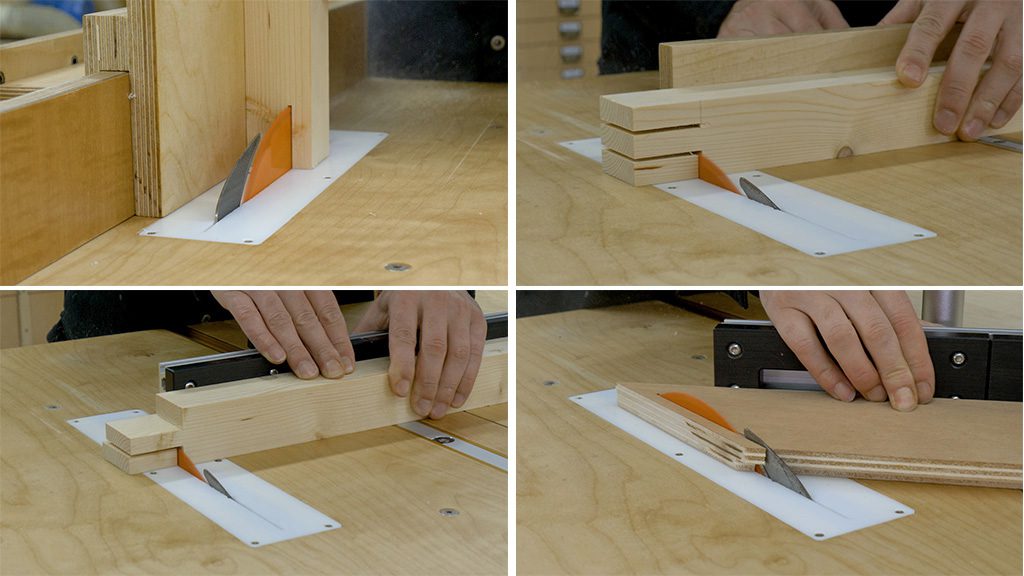
Along with the fence, I can use this tenon jig. I only have to insert it into the fence and make the required cuts after holding the workpiece with a clamp.
The plans also include a plywood miter gauge. I can use it to make angled and cross cuts. Nowadays, on the market, there are fairly affordable miter gauges that you can use with this saw to achieve more accurate cuts.
How to use a homemade jigsaw table?
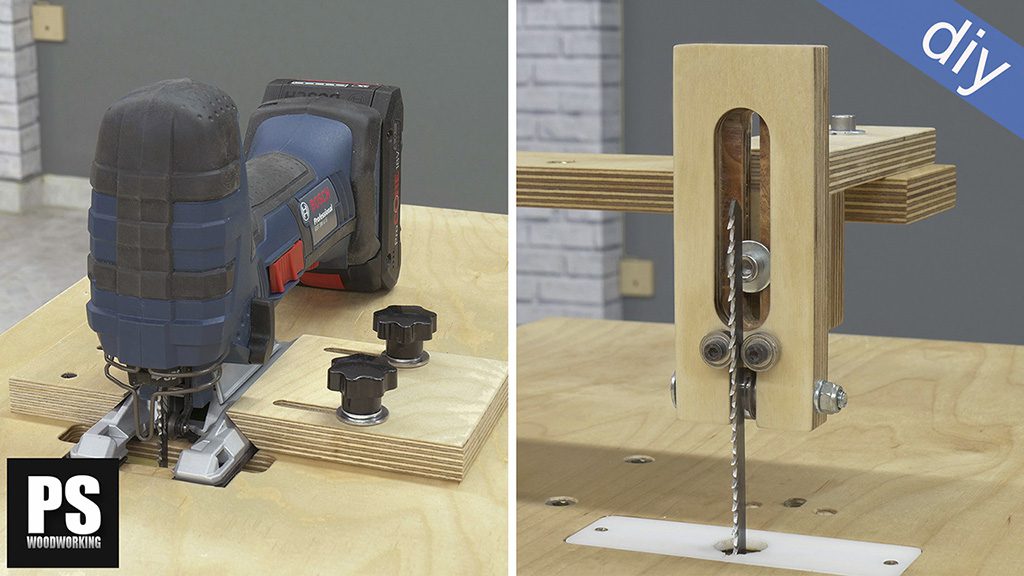
The next function is the DIY jigsaw table. It’s made up of a guide with bearings to keep the blade firm and square when cutting. I’ve designed a fast-locking system for the battery jigsaw. This way I can continue using it as a handheld saw in a matter of seconds.
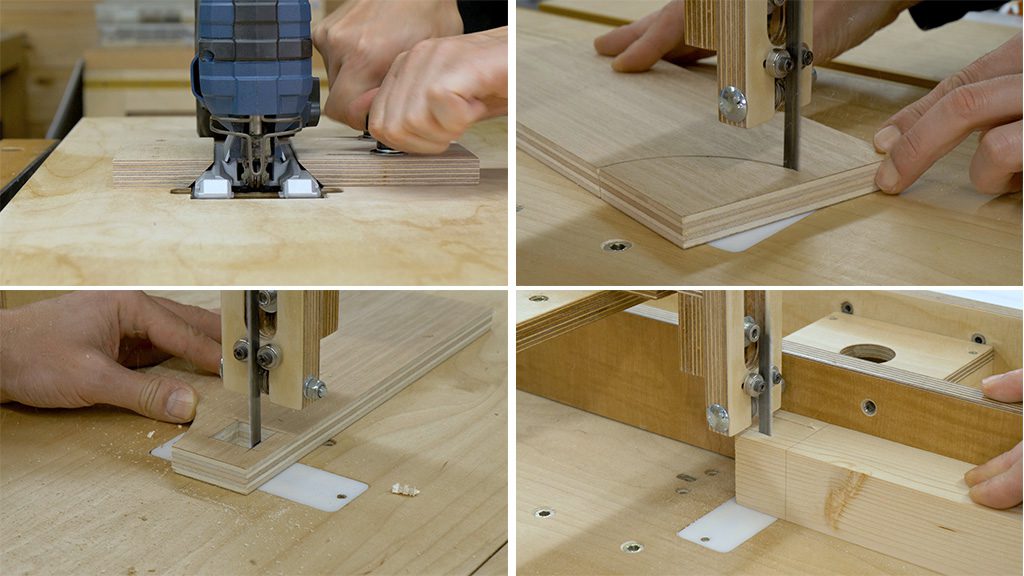
With this saw I can make curved cuts as long as they aren’t too narrow. I can also make other kinds of cuts that are impossible with a bandsaw. By attaching an extra long 150mm blade I can cut up to a height of 70mm.
If the blade is sharp, you can see it can easily cut through hard birch plywood that’s 54mm thick.
Another interesting option is using the fence with the jigsaw table. This allows me to cut tenons and make other kinds of straight cuts. Here I can also use the miter gauge to make cross cuts, angled and non-through cuts.
How to use a homemade router table?

Finally, I’ll show you how to use the DIY router table. Together with the saw table fence I can do almost all kinds of router projects, only limited by the power of these small routers.
The lifting system allows me to tilt the router up to 50 degrees to get the most out of my bits. I can also use the usual accessories for this kind of router such as a miter gauge or featherboards.
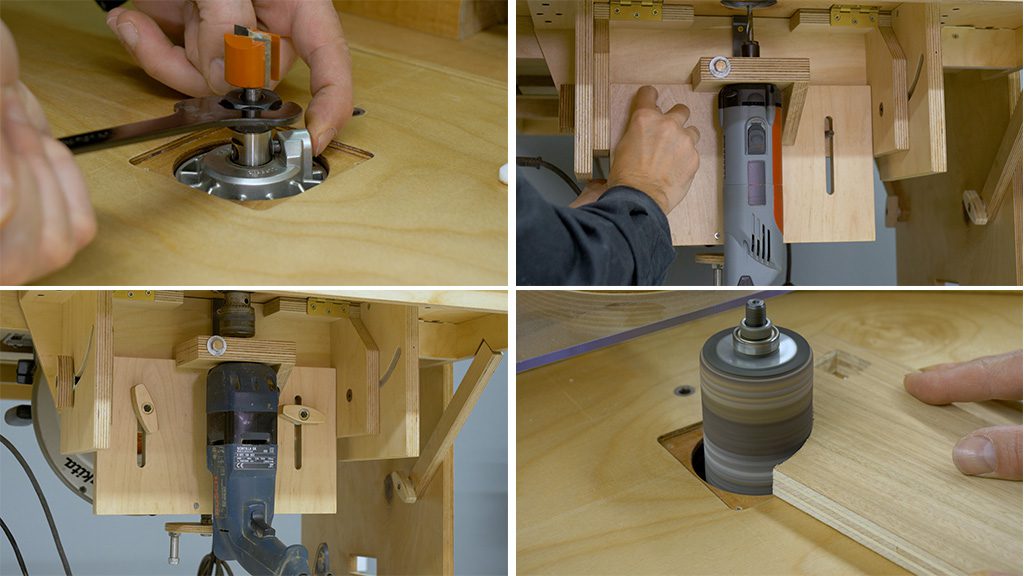
In these shots you can see how easy it is to operate. Another interesting function is that I can swap the front panel to use other routers with different collars.
I can also attach a drill fitted with a collar. This is interesting because it lets me use any drill accessory in the Portable Workshop, such as sanding drums.


Oh, man. I’m so happy for buying the plans and I’m excited to start building it for my small workshop. I’ve just need some spare time 😉 thanks again for sharing this project with us
thanks Luigi!
Man, I love this build. You’ve really perfected this design. Well, along with all of your other builds as well. The router lift in particular is about as simple AND functional as it can be. I guess the simplicity/functionality ratio of the whole build is in perfect balance. If that is a thing. Okay, okay, I’ll order plans already!
thanks Mark!
Hi, I have a lot of thanks to you because of this excellent and valuable content. about anything you have the best concepts and explanations. An Iranian proverb says: Whoever does not thank the servants of God, does not thank God either. So I hope you will accept my thanks. I am one of your regular audience